Tell Us Who You Are
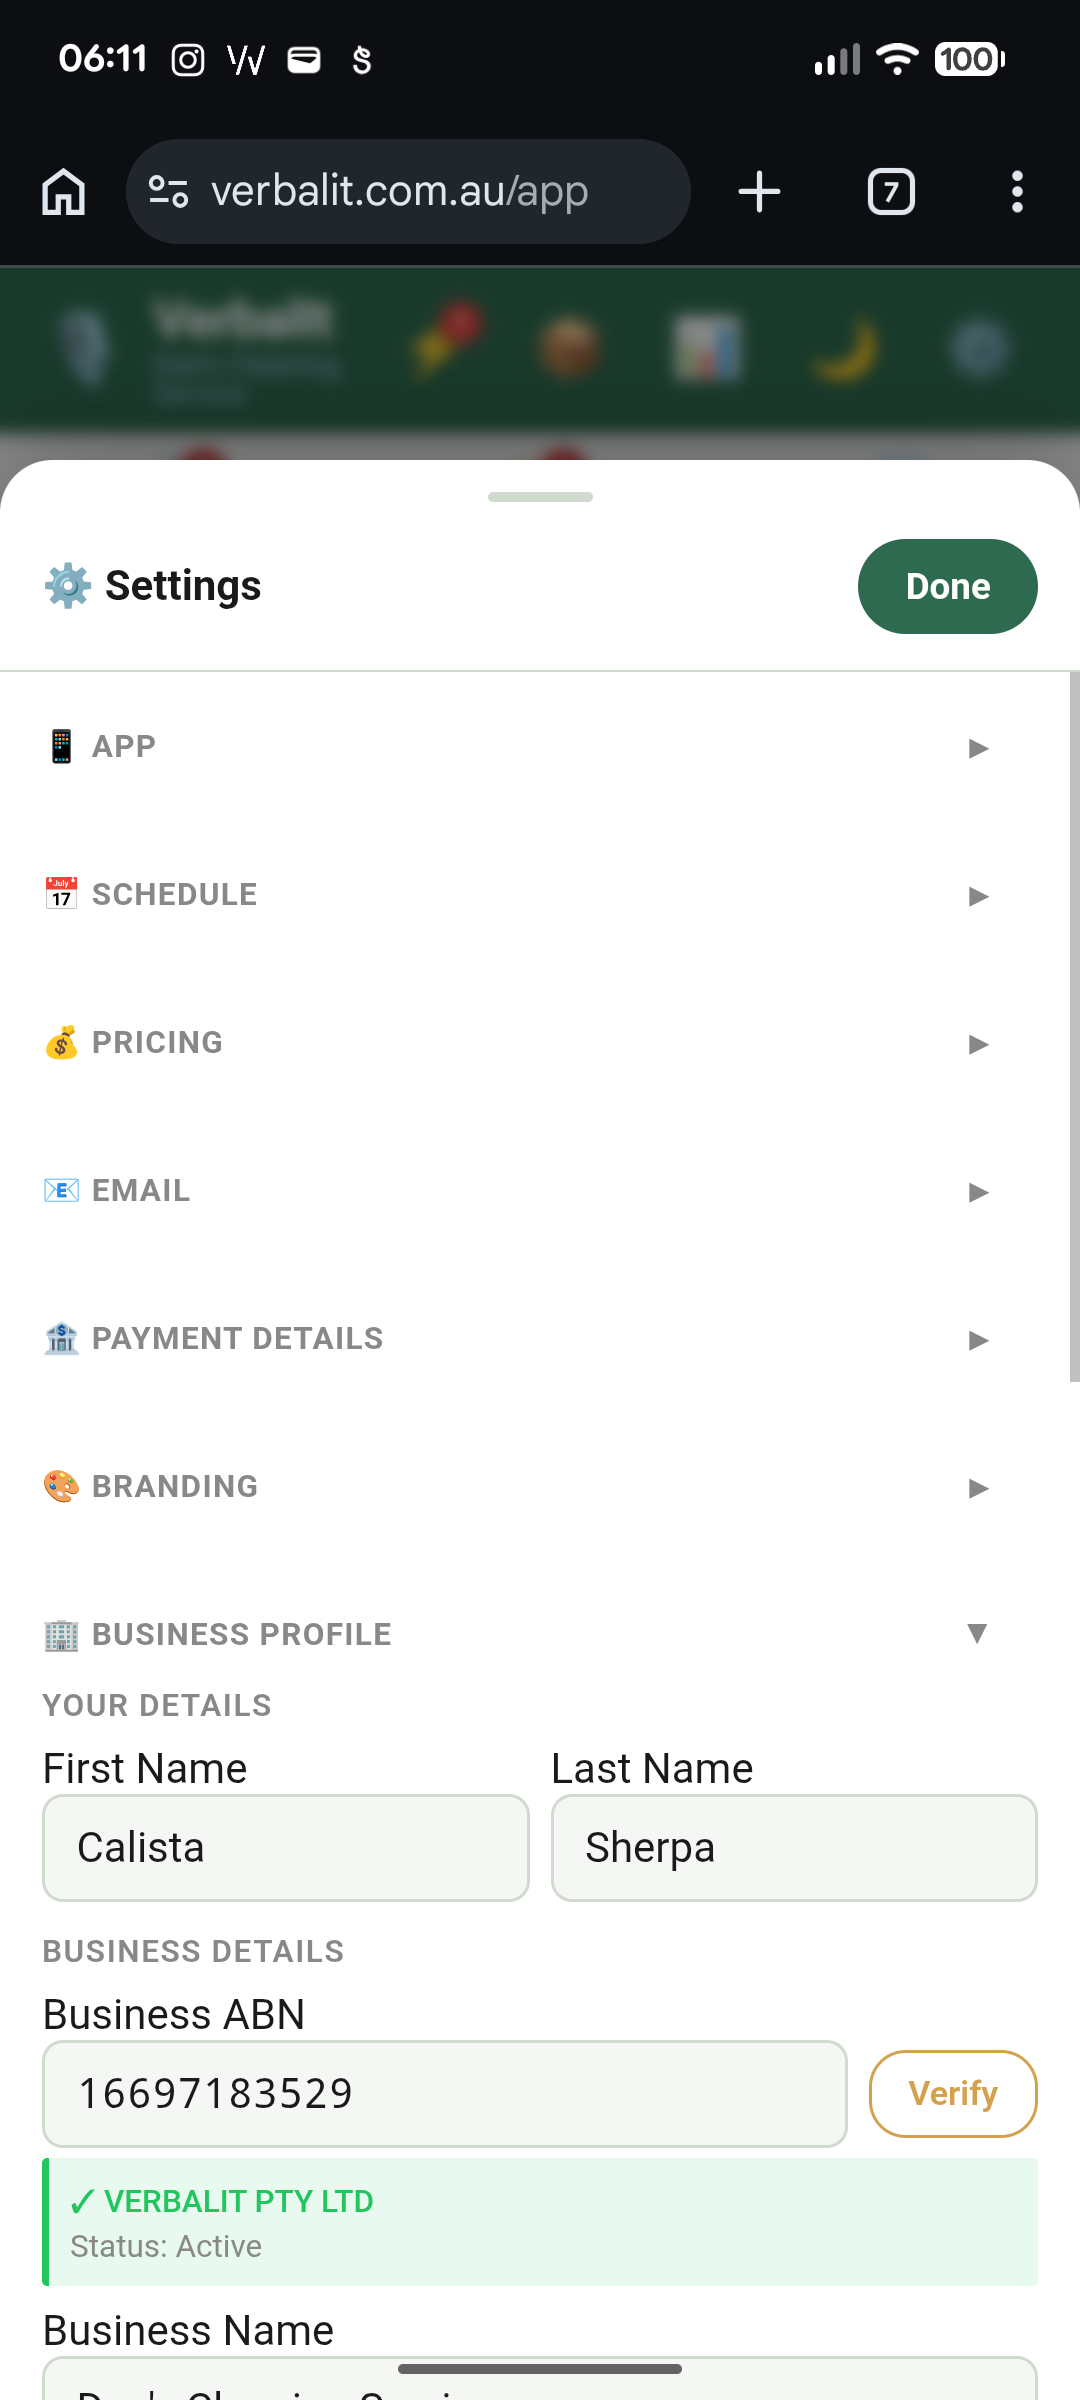
Your profile is what shows up on every quote and invoice you send. If it's empty, your documents look like they came from nobody. Let's fix that.
Head to Settings > Business Profile and fill in the essentials:
- Your Name
- ABN (we'll validate it for you)
- Contact details
Other sections worth a look:
- Branding — your colour & logo (optional, but it makes a difference)
- Payment details — so your clients can actually pay you
Takes 30 seconds to a minute, and now every document you send looks legit.
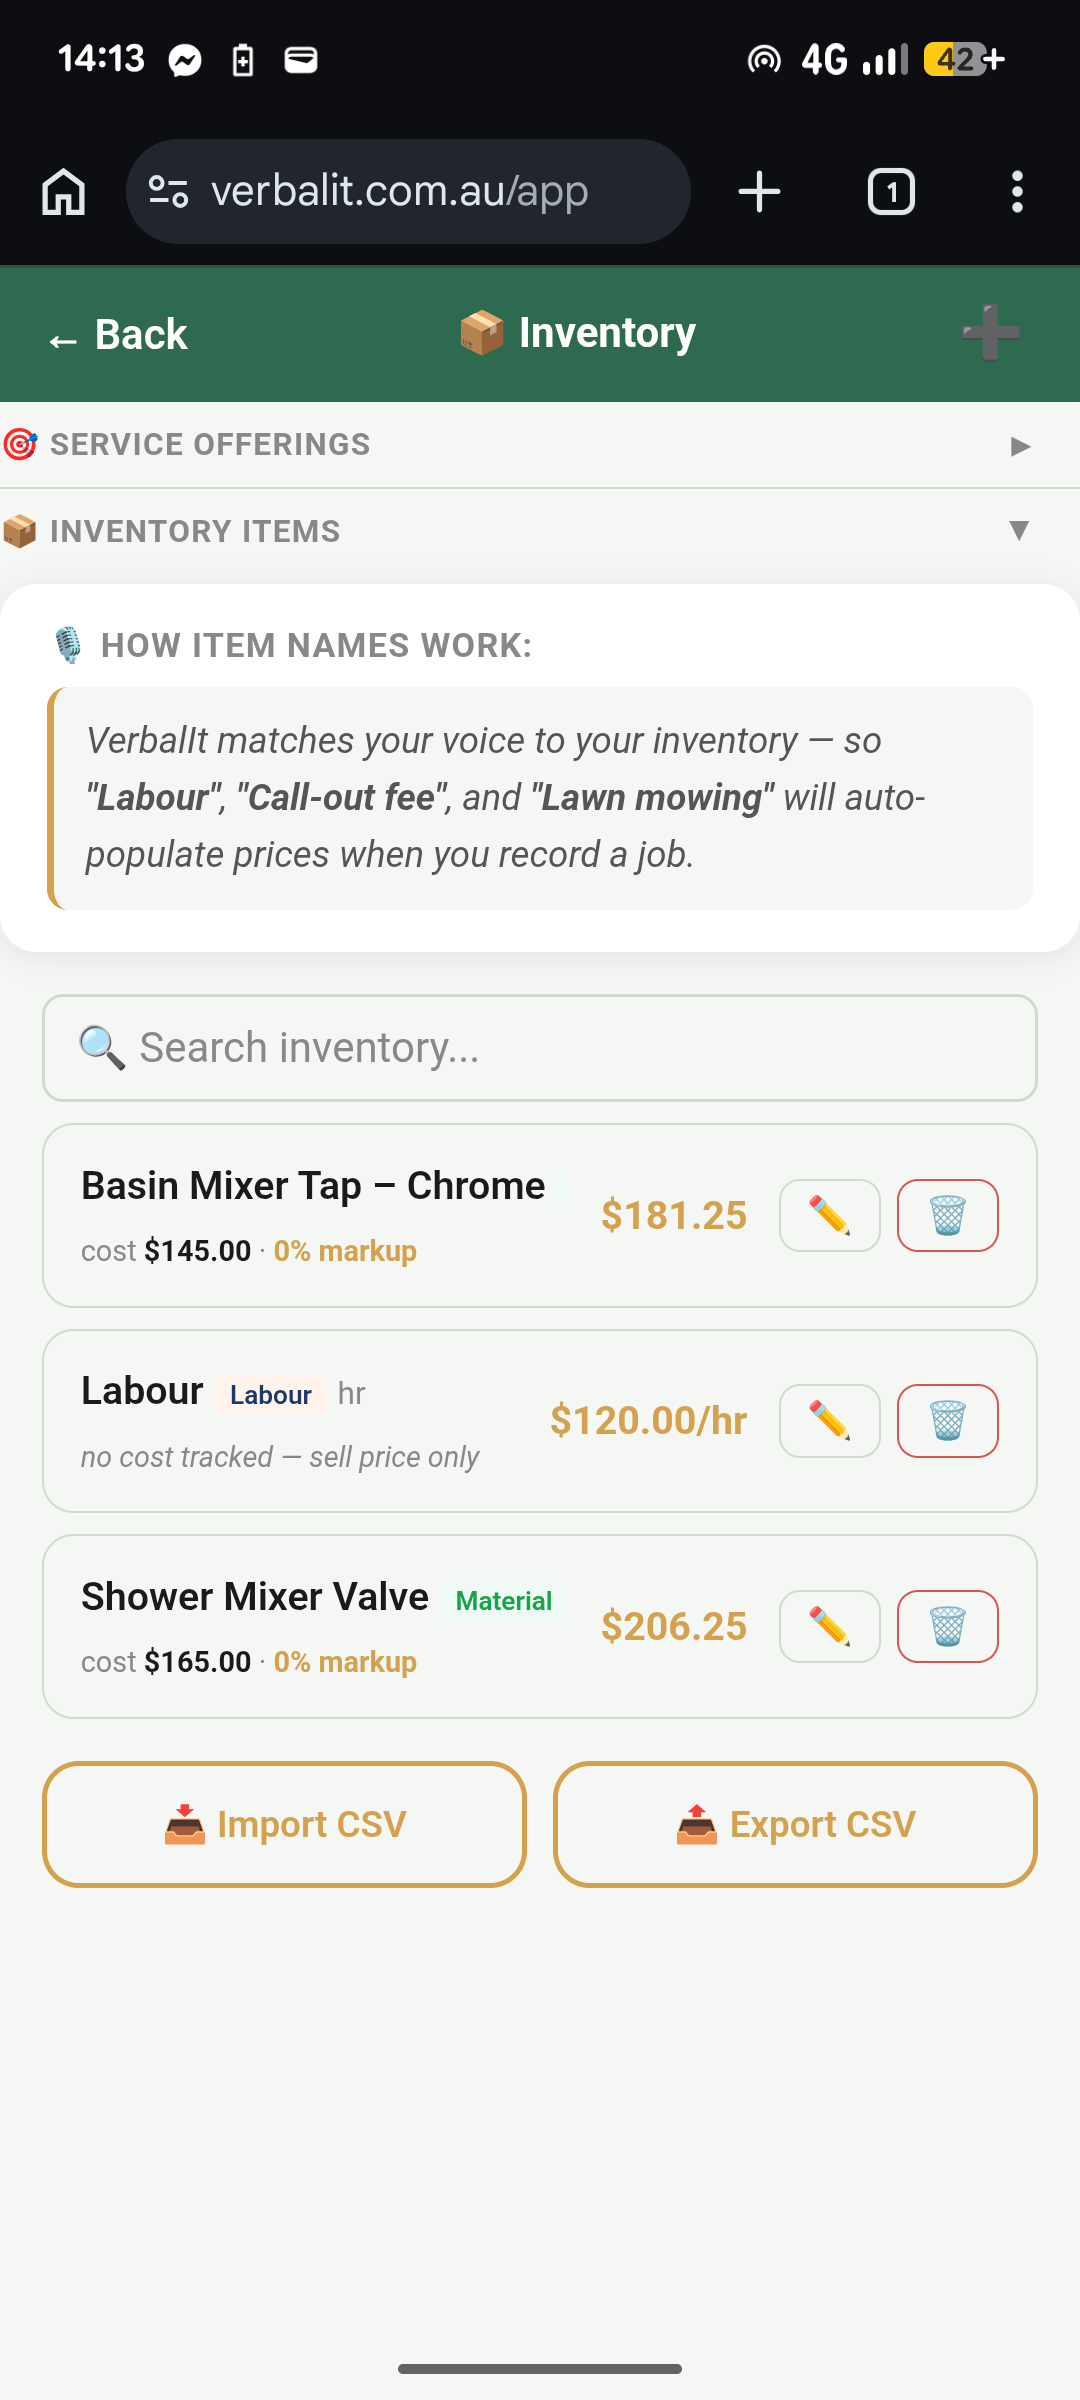
Stock Your Toolkit
Inventory items are the things you quote and charge for. Services, materials, labour — whatever makes up your work.
Open the app and tap Resources. Add a few materials you use regularly:
- Give it a name (e.g. "General Labour", "LED Downlight", "Roof Tile")
- Set a cost (how much it cost you to buy)
- Enter your markup
You don't need to add everything right now. Start with 3–5 items you use most. You can always add more later, and you can add items on the fly when you're recording a quote too.
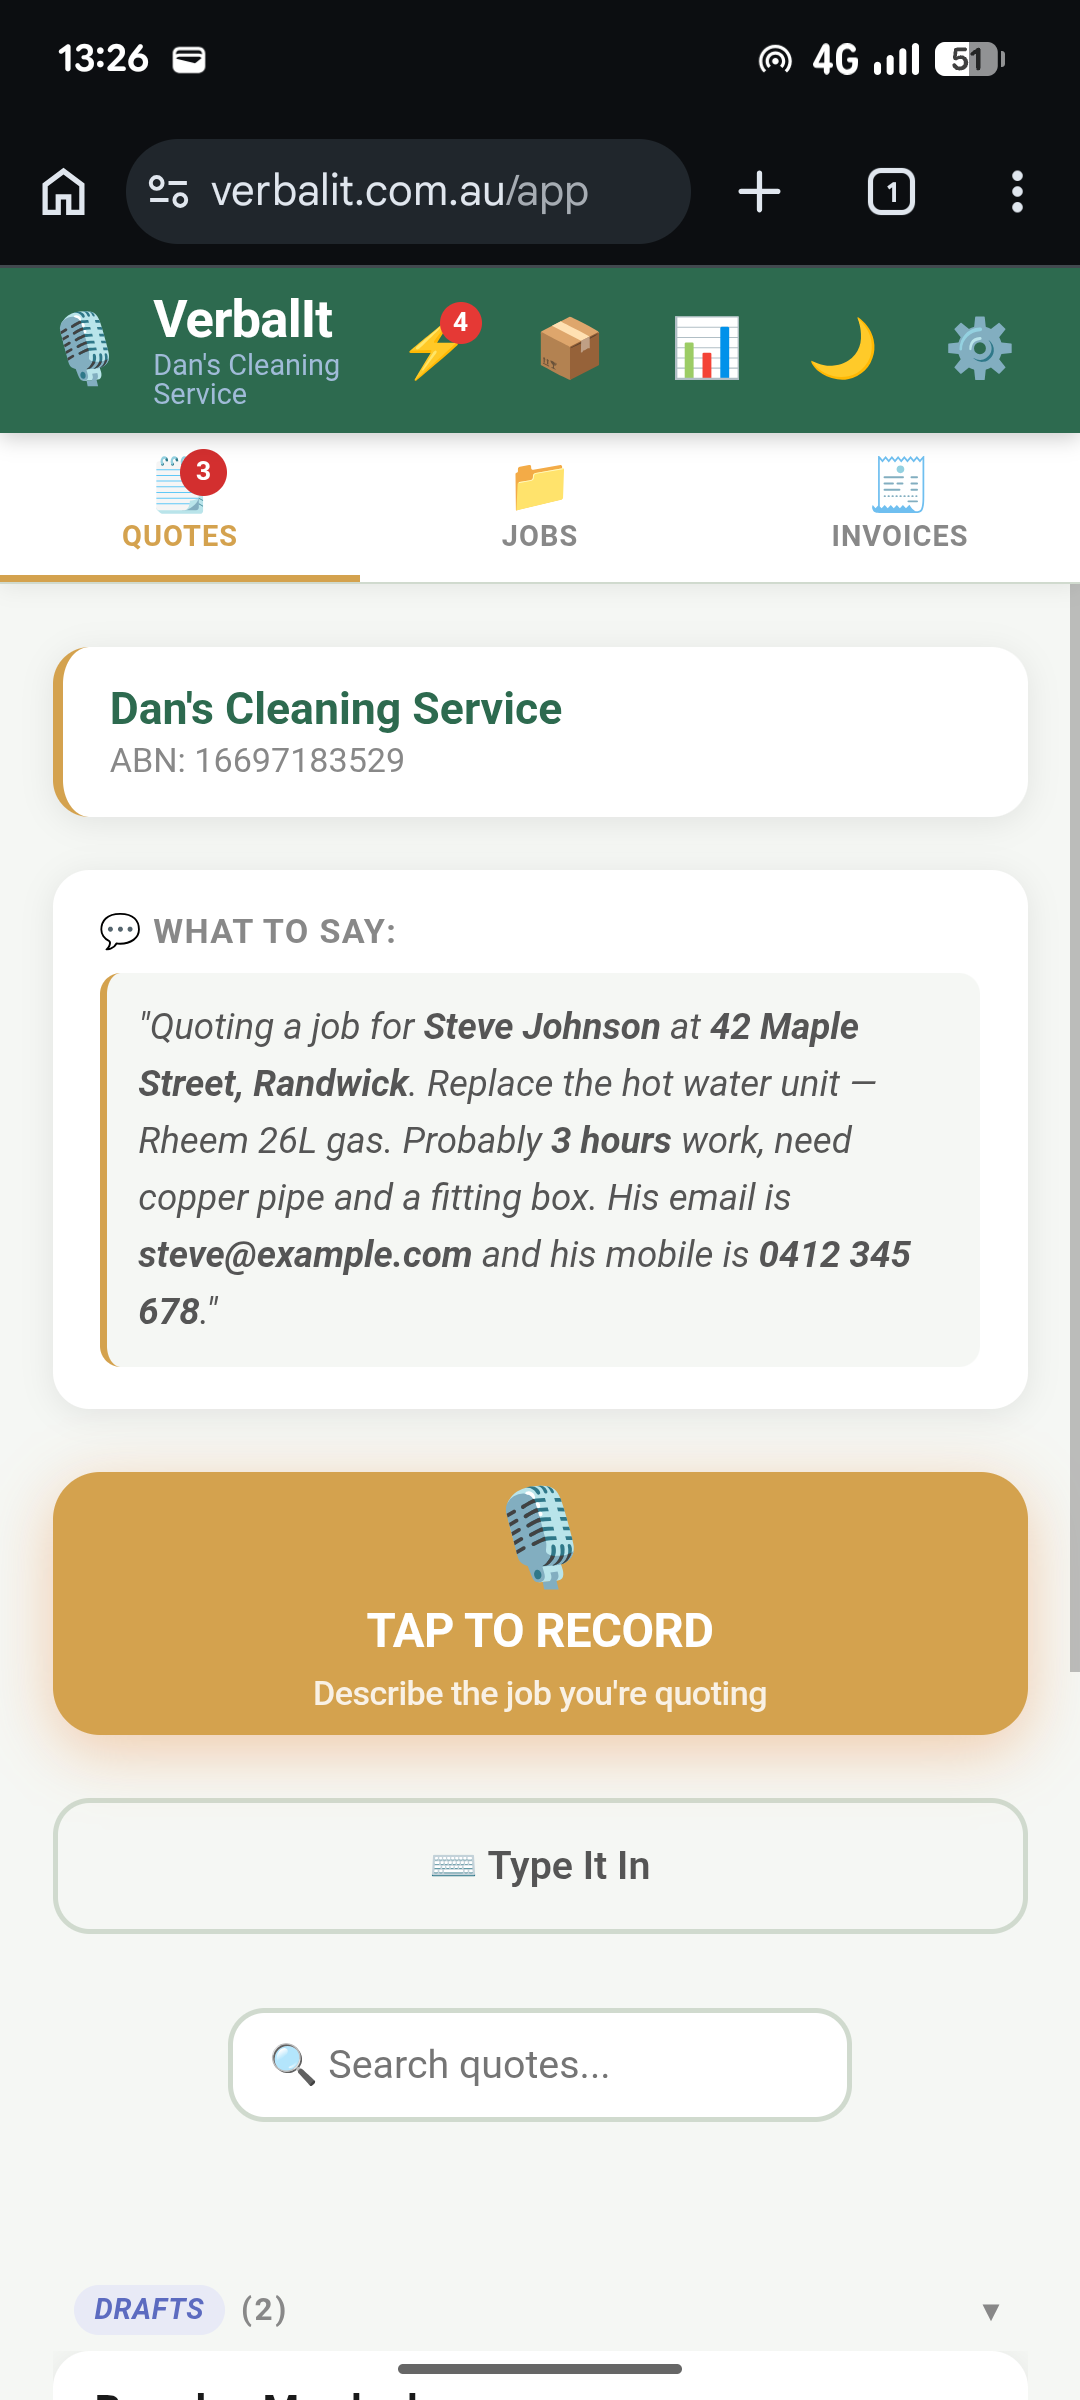
Say It Out Loud
This is the bit that changes everything. Instead of typing out a quote line by line, you just talk.
Head to the Quotes tab and tap the big orange Record button. Describe the job like you're explaining it to the customer:
VerbalIt listens, pulls out the line items, matches them to your inventory, and builds a quote. You talk, we do the paperwork.
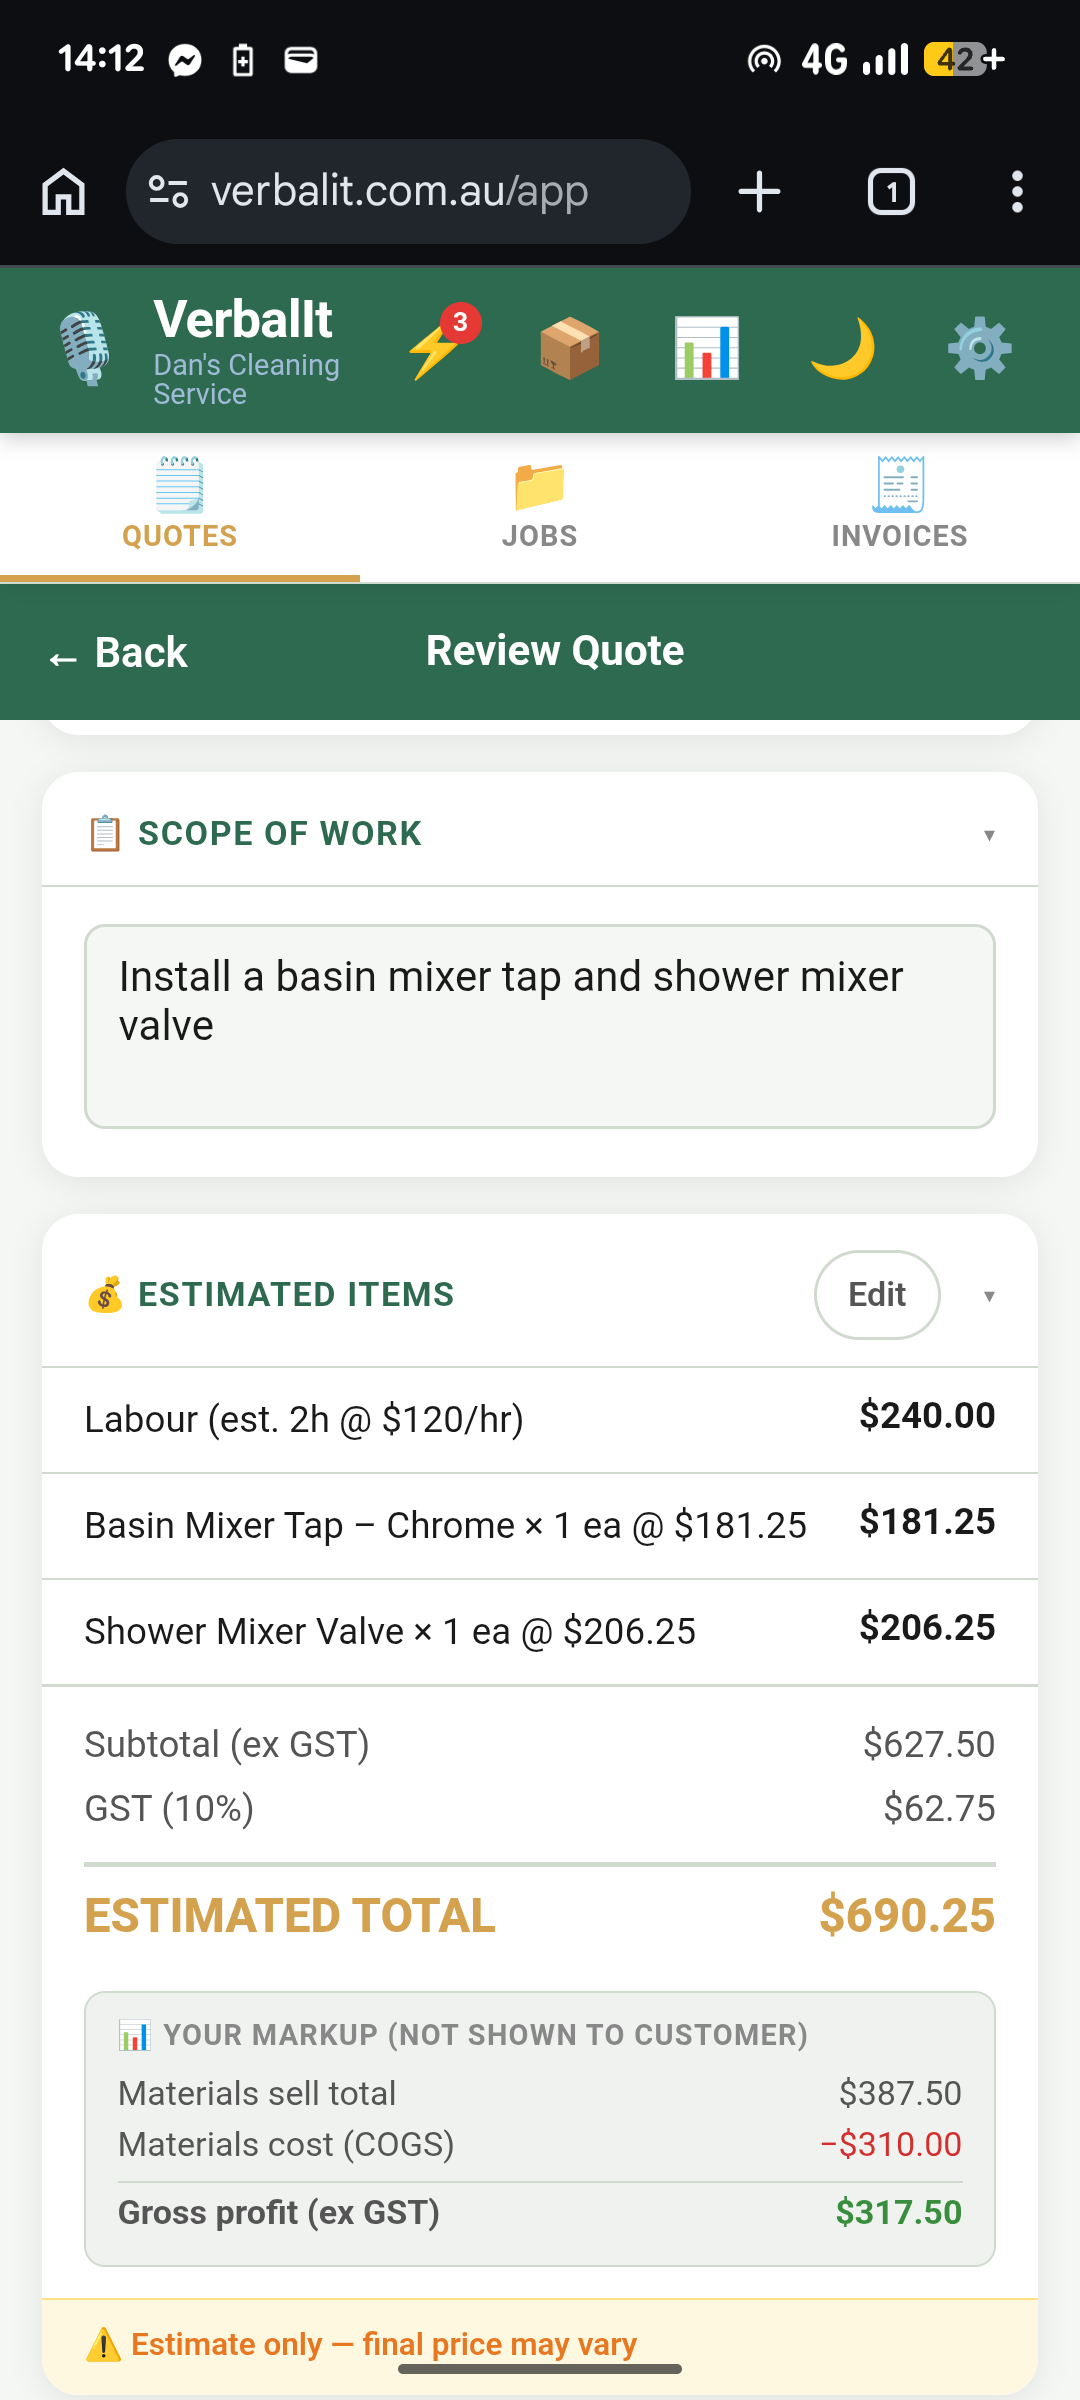
Review and Send
Before anything goes out, you check it. VerbalIt builds the quote, but you're the boss.
After recording, you'll see your quote laid out with:
- Line items and prices
- GST calculated
- Customer details (add them here if you haven't already)
Look it over. Edit anything that needs tweaking. When it looks right, hit Preview & Send — your customer gets a professional PDF quote via email.
First quote: done. Took less time than writing it by hand, and it doesn't look like it was scribbled on the back of a receipt.